SUSPENDED LAMENT: A CASE STUDY

Planning & Designing
Organization and communication were key to our success as a team. One of the first things we did was discuss how we would function as a team. We were all united in our wanting to make something beautiful and challenging, but we had to ensure we were on the same page in terms of workload, communication, scheduling, etc. We discussed and recorded how many hours we could each dedicate to the project, what group norms we wanted to set, our goals for the project, our previous experience working in teams (what worked and didn’t work), and the skills and techniques we each had experience with. This allowed us to decide our roles and responsibilities. We then created a group chat and filled out a calendar to decide when we could all meet.

I then made a shared Google Folder (organized with sub-folders), a Gantt Chart, and a BOM (Bill of Materials) which would evolve as we worked.
With a plan in place, we started sketching designs, iterating through ideas as we discovered what materials would be necessary for purchase.

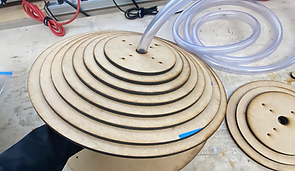
By calculating the dimensions of each disk that would make up the body of the tentacle, I was able to determine how much material we would need to purchase (left).
Our original design involved a system of springs (right). With this rough design in place, we went to Home Depot to check out materials and begin some preliminary material testing.

Materials & Testing
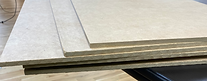
We knew we needed a strong yet flexible spine and a durable yet light material for the disks that would make up the body. MDF was cheap, durable, and – importantly – could be cut via laser cutter for accurate shape and sizing. It was also lighter than hardwood, which would be important for functional movement. We found a steel cable that would be the perfect puppeteering string; durable and tightly wound to ensure minimal friction against the MDF.

We then cut, stretched, bent, and mangled various springs in a rigorous testing process. Sparks flew, and we tested how the springs might attach to the disks, their ability to hold weight in an upright position, and their flexibility. In the end, it was clear that the spine would function best as one continuous piece that spanned the length of the tentacle. On a tight schedule and budget, finding an 8-foot spring would be tricky, so we turned to irrigation hosing, testing multiple materials and thicknesses before settling on a clear tubing that would ultimately become the spine.
We also ordered an 80 kg 270 degree Servo motor for testing. It seemed to work well and pull ample weight, so we ordered the remaining 7 and tested some code out on all 8 motors (right).

Fabrication
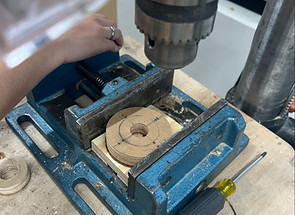
With materials purchased and tested, we began fabrication. There were three primary components that needed to be fabricated before assembly: (1) the disks that would make up the body of the tentacle, (2) the spools that would attach the motors and drive the cables, and (3) the connectors that would securely attach each segment of the body to the tube spine.


I made cut files for each component in Adobe Illustrator (left) and ran the designs by my group before cutting. By laser cutting the majority of the components, we sped up the fabrication process and ensured accurate measurements. For thicker elements that couldn't be laser cut, such as the connectors, I engraved a guide onto the materials so that they could be hand-cut and/or drilled accurately.
Using a panel saw, I cut the large MDF boards to fit the laser cutter bed. Once the disks, spools, and connectors were crafted, we began to assemble the tentacle.
Assembly
We connected the disks to the spine using our connectors. This involved passing a small piece of wooden dowel down the tube to each intersection with a disk (below, left). The connectors, which had been securely fastened to the disks (via a combination of wood glue, bolts, and nuts), were then secured to the spine by drilling through the connector into the dowel-supported tube.

Once all 9 disks had been secured, we lifted the tentacle and manually puppeteered it to test its movement. Unfortuantely, We were only able to get movement in the lower part of the tentacle. It became apparent that the disks were too heavy for our small Servo motors to lift. We would need to give the disks a dramatic weight reduction, so I adjusted the original Illustrator files and showed the team a few potential designs.
The team chose the design above, and I re-cut the disks by placing them into their original MDF boards such that things would line up in the laser cutter. The resulting tentacle (right) was far lighter, put less stress on the motors, and allowed more dramatic movement.


Primary Testing
After fabricating the tentacle's body, we began designing the "birdhouse," which would suspend the tentacle from the ceiling and house all electrical components discretely. We first attached the motors to the spools to test their movement (below, left).

After ensuring that inverted motion was possible with our hang test, we attached speedrail to the top of the birdhouse (right). This would allow us to securely hang the tentacle from the ceiling grid in our gallery space.
With the motors and spools attached to our steel cables, we could perform our first true hang test! We rested the tentacle on two rolling whiteboards and anxiously powered it up (right).


Final Testing & Installation
With the speedrail attached, we did some final testing, attaching the tentacle to the ceiling grid in our workspace (below, left).

The speedrail held great, so we spent some time here adjusting the code until we felt we had achieved the perfect movement.
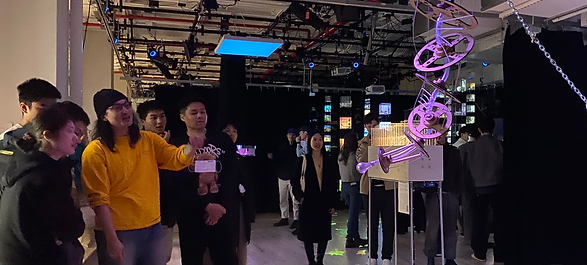
Finally, we brought our project to the installation space and securely attached it to the ceiling grid, using safetly cables to ensure no accidents (right).


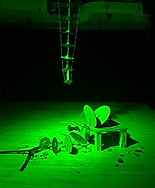
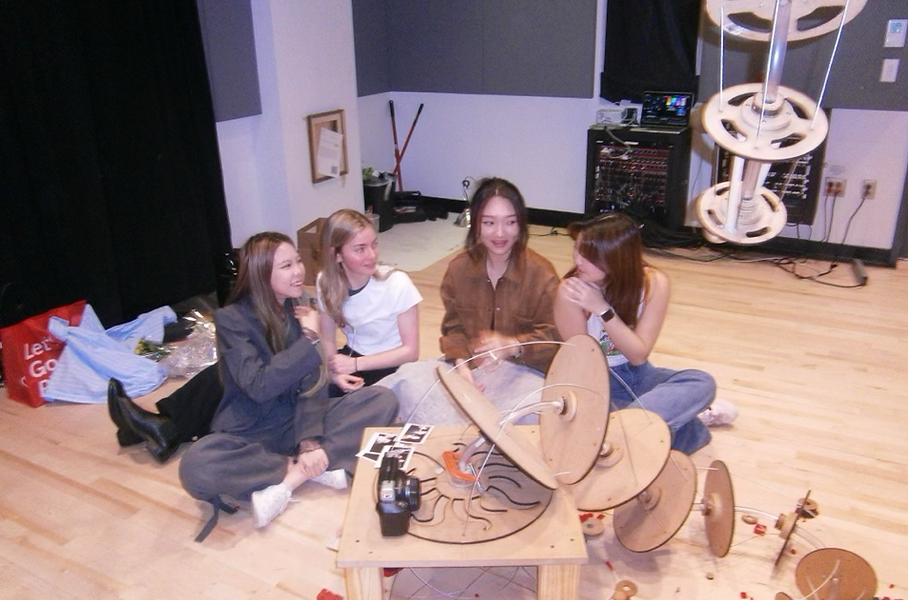
After attaching the tentacle to the ceiling of the gallery space, we began to "set the scene;" we shifted components around, toyed with the lighting, and did sound design to ensure a fully immersive experience. This is when our story really came to life.